This blog records the problems I encountered and the knowledge I learned in software project development. The blog content includes programming knowledge such as Python coding standards, learning notes, and design philosophy.
Python
The Zen of Python
-
One of coding’s key sights is that code is read much more often than it is written.
-
“Readability counts!”
-
Readability is much more important than code length & showing off coding skills & slight efficiency improvement.
-
Consistency is the foundation of the readability.
Name Conventions
| Type | Naming Conventions | Example | PS |
|---|---|---|---|
| Class Names | CapWords | Class Agent(): | CapitalizedWords |
| Type Variable Names | CapWords | KT=TypeVar(’kT_contra’,…) | |
| Exception | CapWords+“Error” | KeyError | word +”Error” |
| Function Names & Method Names | snake_case | def get_user_names(): | avoid abbreviations |
| Variable Names | snake_case | user_name、any_str、agent_num | short, simple,abbv |
| Module(fIle.py) | snake_case | agents.py、agent_define.py | avoid abbreviations |
| Package Names | lowercase(prefer)、snake_case | pip install langchain | folder names |
Special Name Conventions
| Conventions | Example | PS | |
|---|---|---|---|
| Constant | UPPERCASE | OPENAI_BASE | if long: _ OK |
| Class Private Variables\Method | _snake_case | def _get_attr(): | leading underscores |
| Instance Methods Arguments | self,… | def get_abc(self,x): | first argument is self |
| Class Method Arguments | cls,… | @classmethod def get_abc(cls,x): |
first argument is cls |
| Conflict With Reserved Word | +”_” | class_, int_ | |
Readability Promotion
-
More is better.
#Correct: def foo(x): if x >= 0: return math.sqrt(x) else: return None def bar(x): if x < 0: return None return math.sqrt(x) # Wrong: def foo(x): if x >= 0: return math.sqrt(x) def bar(x): if x < 0: return return math.sqrt(x) -
Isinstance > type.
# Correct: if isinstance(obj, int): # Wrong: if type(obj) is type(1): -
Don’t compare values with True
# Correct: if greeting: # Wrong: if greeting == True: -
Use
''.startswith()and''.endswith()instead of string slicing [-3:]==XXX in if conditions# Correct: if foo.startswith('bar'): # Wrong: if foo[:3] == 'bar':
Optional Requirement
-
Efficient concat of string
# Time complexity O(n)
''.join
How Python Works
Grammar Knowledge Base
Union:
Union is a generics type in the typing module in the python, used to represent one of multiple types. In typing hint, Union can be used to indicate that a variable can be one of multiple types. For example, Union [int, str] means that a variable may be int or string.
**Example **
MessageLikeRepresentation = Union[
    MessageLike,
    Tuple[str, str],
    Tuple[Type, str],
    str,
]

# The code means that the type of MessageLikeRepresentation can be one of MessageLike, Tuple[str,str], tuple[Type, str] and str.
Tuple: Unchanged List
Example for Union and Tuple
from typing import Union,Tuple,List

def testTuple(elem:Union[Tuple[str],List[str]]) -> Tuple:
    print(elem[0],elem[1])
    print(f"Index:{elem.index('elem0')}")
    # ValueError: 'elem0' is not in list
    print(f"Count:{elem.count('elem1')}")
print("Test tuple: ")
testTuple(("elem0","elem1"))
print("Test Union: ")
testTuple(["elem0","TestUnion1"])
print(Union[])
Output
Test tuple:
elem0 elem1
Index:0
Count:1
Test Union:
elem0 TestUnion1
Index:0
Count:0
PS: Union in Typing is completely different from the union method in set. Union() method:
### union method in set
def test_union_method_in_set():
    x={"a","b","c"}
    y={"d","e","f"}
    z={"1","2","3"}
    print(z.union(x,y))
    # Output:{'b', 'a', '1', 'f', 'c', '3', '2', 'd', 'e'}
Try Catch
# Correct:
try:
    value = collection[key]
except KeyError:
    return key_not_found(key)
else:
    return handle_value(value)
# Wrong:
try:
    # Too broad!
    return handle_value(collection[key])
except KeyError:
    # Will also catch KeyError raised by handle_value()
    return key_not_found(key)
Async : Asynchronous (Coroutine)
import asyncio

async def task1():
    print("Task 1 started")
    await asyncio.sleep(2)
    print("Task 1 completed")

async def task2():
    print("Task 2 started")
    await asyncio.sleep(1)
    print("Task 2 completed")

async def main():
    await asyncio.gather(task1(), task2())

# 在异步环境中运行主函数
asyncio.run(main())

# Main started
# Task 1 started
# Task 2 started
# Task 3 started
# Task 3 completed
# Task 2 completed
# Task 1 completed         /3.1s
How Import Works
How Python Works?
- Python is a dynamic, interpreted(bytecode-compiled)language.
As a result
- As a result, there are no type declarations of variables, parameters, functions, or methods in the source code. Python tracks the types of all values at runtime (Rather Than Compiled Time) and flags code that does not make sense at run.
def main():
    if name == 'Guido':
        print(repeeeet(name) + '!!!')
        ### Only show errors at runtime
    else:
        print(repeat(name))
- If you run a Python script, the Python interpreter will act as the following steps. For, example, if you run a piece of followed code.
project/
|-- run.py
|-- A/
|   |-- __init__.py
|   |-- a.py
|-- B/
|   |-- __init__.py
|   |-- b.py
### run
~/(py38) python ~/project/run.py
- The order in which the interpreter searches for modules is described as a sequence of steps.
-
Current Working Directory (
'~'): The directory from which the script is executed is checked first. If the module is found there, it is imported. -
Script‘s Directory (
~/project/):The directory of the python script -
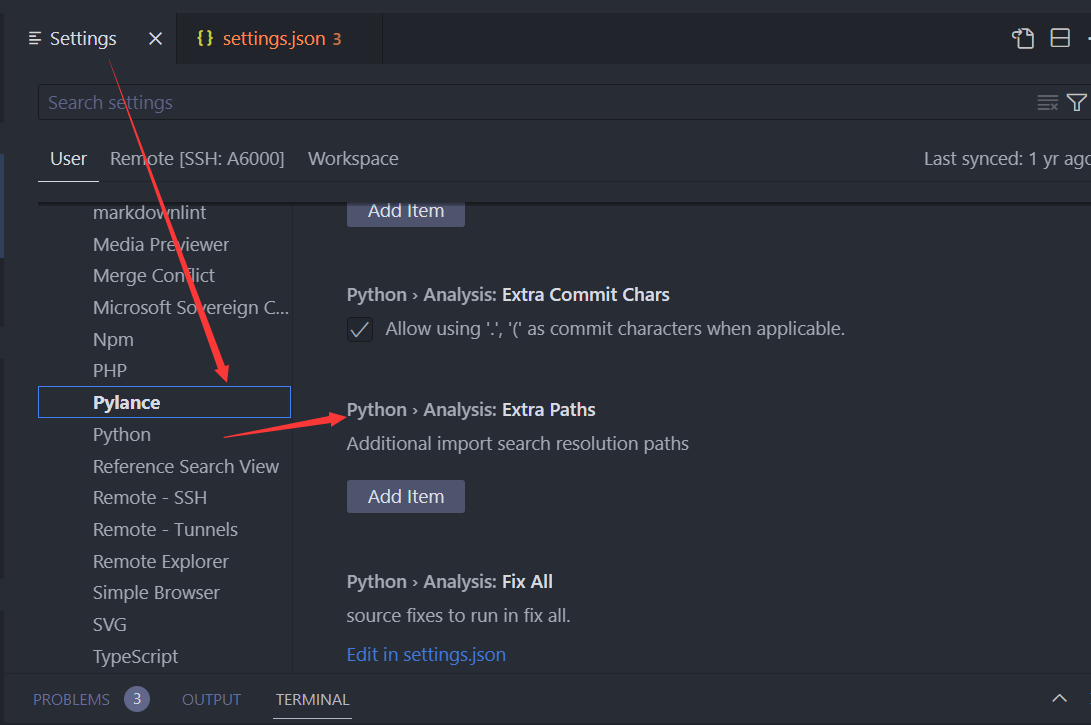
PYTHONPATH Environment Variable: If the PYTHONPATH environment variable is set, the directories specified in it are searched next. Modules found in these directories are considered. **PS: In the Visual Studio Code (VSCode), When opening the project in the workspace, the”
${workspace}/src” sub-folder will be automatically added as PYTHONPATH ** -
Standard Library: The interpreter then checks the standard library modules, which are part of the Python distribution.
-
Built-in Modules(内置模块): Python has a set of built-in modules that are always available. These are searched next.
-
Site Packages: Finally, the interpreter looks in the directories specified by the site-packages directory, where third-party packages installed using tools like pip reside.
How __init__.py works?
-
Initialization in
__init__.py:Suppose
__init__.pyin themy_packagedirectory contains the following code:pythonCopy code# my_package/__init__.py print("Initializing my_package") # Additional initialization code or configuration can go hereWhen you import
my_package, the code in__init__.pywill be executed:pythonCopy codeimport my_package # Output: Initializing my_package -
Simple but easy to forget. ref
studio
    tools
        __init__.py
        camera
            __init__.py
            camera.py
        element
            __init__.py
            element.py
from studio import tools tools.camera.fn() tools.CameraNode('') tools.element.fn()If you have a studio/tools/
__init__.pyfile like this:from tools.camera import * from tools.element import *Then you can do a single import elsewhere like:
from studio import tools
## if you want to do tools.camera then you must import camera in the __init__.py
and then reference everything as if it were directly in studio tools. An
__init__.pyfile allows you to treat any directory as a Python package. It is not necessary to write anything in the file itself, just creating it in your directory is enough. if you want to access Python files in sub-directories as well, then you must import those in the__init__.pyof the parent directory. -
This is done to prevent directories with a common name, such as string, utils, re
-
In the simplest case, init.py can just be an empty file, but it can also execute initialized code for the package or set the all variables, described later.
Import Python Scripts In Terminal - PYTHONPATH
-
export PYTHONPATH="XXXX" ## temporary and harmless
Import Python File in Vscode

Project Organization
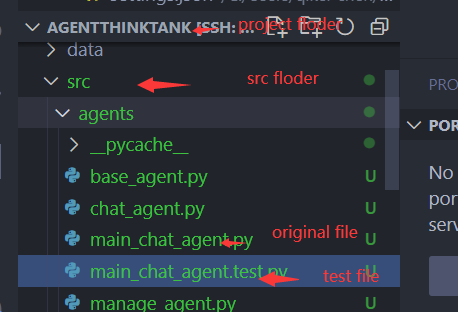
Code Snippet

Vscode Setting In Python Project
How Does An Error Traceback Work?
` Philosophy Of Debug`
Error Stack
How to find bugs in traceback elegantly?
Example
There is an error traceback, which was found in the Openai module. The first question is - how to locate the bug?
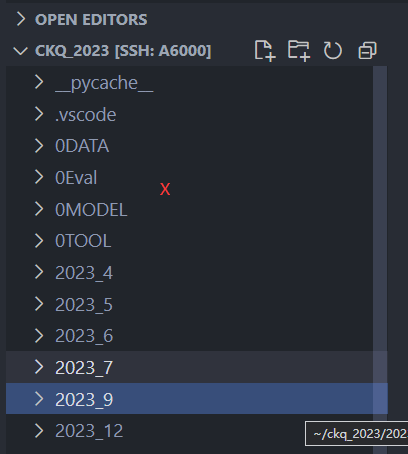
This is project organization.
Agent_UI.py
- agents
  main_chat_agent.py (called)
  ....
....
Here is the error traceback.
In the last information, we found two keywords: **“modelType”** and **Unrecognized Request Arguments**. So the most efficient method to find the error is:
File “Agent_UI.test.py”, line 37, in
for chunk in response: PS:The top stack: a possible error location File “Agent_UI.test.py”, line 32, in outer_yield for chunk in inner_stream:
File “/home/ckq/ckq_2023/2023_12/AgentThinkTank/src/agents/main_chat_agent.py”, line 32, in stream for chunk in self.chat_model.stream(self.messageHistory):
File “/home/ckq/miniconda3/envs/py38/lib/python3.8/site-packages/langchain_core/language_models/chat_models.py”, line 244, in stream raise e
File “/home/ckq/miniconda3/envs/py38/lib/python3.8/site-packages/langchain_core/language_models/chat_models.py”, line 228, in stream**for chunk in self._stream( **
File “/home/ckq/miniconda3/envs/py38/lib/python3.8/site-packages/langchain_community/chat_models/openai.py”, line 394, in _stream for chunk in self.completion_with_retry(
- The Agent_UI called the stream function in main_chat_agent.py. **But the last called function didn't mean that the error was located at here.**
File “/home/ckq/miniconda3/envs/py38/lib/python3.8/site-packages/langchain_community/chat_models/openai.py”, line 360, in completion_with_retry return_completion_with_retry(**kwargs)
File “/home/ckq/miniconda3/envs/py38/lib/python3.8/site-packages/tenacity/init.py”, line 289, in wrapped_f return self(f, *args, kw)
*File “/home/ckq/miniconda3/envs/py38/lib/python3.8/site-packages/tenacity/init.py”, line 379, in call do = self.iter(retry_state=retry_state)
*File “/home/ckq/miniconda3/envs/py38/lib/python3.8/site-packages/tenacity/init.py”, line 314, in iter return fut.result()
*File “/home/ckq/miniconda3/envs/py38/lib/python3.8/concurrent/futures/_base.py”, line 437, in result return self.__get_result() _
*_File “/home/ckq/miniconda3/envs/py38/lib/python3.8/concurrent/futures/_base.py”, line 389, in __get_result raise self._exception __
File “/home/ckq/miniconda3/envs/py38/lib/python3.8/site-packages/tenacity/__init.py”, line 382, in call result = fn(args, **kwargs)
File “/home/ckq/miniconda3/envs/py38/lib/python3.8/site-packages/langchain_community/chat_models/openai.py”, line 358, in _completion_with_retry return self.client.create(**kwargs) _
_File “/home/ckq/miniconda3/envs/py38/lib/python3.8/site-packages/openai/api_resources/chat_completion.py”, line 25, in create return super().create(*args, **kwargs)
_File “/home/ckq/miniconda3/envs/py38/lib/python3.8/site-packages/openai/api_resources/abstract/engine_api_resource.py”, line 153, in create response, _, api_key = requestor.request(
_File “/home/ckq/miniconda3/envs/py38/lib/python3.8/site-packages/openai/api_requestor.py”, line 298, in request resp, got_stream = self._interpret_response(result, stream)
File “/home/ckq/miniconda3/envs/py38/lib/python3.8/site-packages/openai/api_requestor.py”, line 700, in _interpret_response self._interpret_response_line(
File “/home/ckq/miniconda3/envs/py38/lib/python3.8/site-packages/openai/api_requestor.py”, line 763, in _interpret_response_line raise self.handle_error_response( openai.error.InvalidRequestError: Unrecognized request argument supplied: modelType
The most important information. Python found wrong type of argument. But it didn't mean that the error located at the superlink the traceback gived.
- Search the “modelType” key in agent_UI.py and main_chat_agent.py. (modelType)
- Look up the Function Calls / Class Instantiation in both files. (Unrecognized Request Arguments)
- Look up the
__init__arguments (class/function). - Look up the Openai’s class.
So, how the traceback was generated?
How is the traceback generated?
The traceback is generated with the following steps:
- Exception Triggering: An exception occurs during program execution, which could be due to faulty code, invalid input, or other issues.
- Exception Propagation: The exception propagates from its occurrence point until it encounters a handler (e.g., a try-except block) or until the program terminates.
- Traceback Generation: When an exception goes unhandled and reaches the top level, Python generates a
tracebackobject containing detailed information about the exception, such as the type, error message, and the call stack.- Traceback Analysis: Developers can examine the
tracebackto understand where the exception occurred and how it propagated. The call stack information shows where the exception originated and the context of each call.
In traceback, the following information is provided. The philosophy of debugging is :
| Type | Example | Explanation | Methods of Debug | | ————————— | ——————————— | ————————————————————————————————————————————————— | ———————————————————————————————————————————————————————— | | Exception Type: | Unrecognized request argument | Check the beginning of the traceback, which typically includes the exception type and error message. This helps identify the nature of the problem. | Most important information. | | Call Stack Information: | Stack1 -Stack2 - …. | Extract the function call sequence and positions from the traceback. Traversing the traceback helps pinpoint the location of the error. | Search from your own files \ Sometimes error isn’t from the bottom stacks. The error may be transferred to bottom an than found in bottom.(python have not type check) | | File and Line Numbers: | Agent_UI.py & lineXXX | The traceback provides the file name and line number where the error occurred, facilitating quick identification of the problematic code. | Please do not blindly believe line number and offered links. Because the line numbers indicate the path of calling functions rather than the error locations | | Context Information: | modelType | Tracebacks may also include additional context, such as the values of local variables, aiding further in the debugging process. | Search key words |
Python Virtual Env (Conda)
pip
## install this package
pip install -e .
conda
For users in mainland China, the Anaconda official website is blocked by GFW. However, setting a proxy server in Conda’s config file is not a good choice. In most cases, you may encounter the ** SSL error**(unsupported protocol sock5). So, a recommended method is using the mirror source of anaconda, such as 清华源.
### ~\.condarc Tsinghua source config
channels:
  - defaults
show_channel_urls: true
ssl_verify: false
auto_activate_base: false
default_channels:
  - https://mirrors.tuna.tsinghua.edu.cn/anaconda/pkgs/main
  - https://mirrors.tuna.tsinghua.edu.cn/anaconda/pkgs/r
  - https://mirrors.tuna.tsinghua.edu.cn/anaconda/pkgs/msys2
custom_channels:
  conda-forge: https://mirrors.tuna.tsinghua.edu.cn/anaconda/cloud
  msys2: https://mirrors.tuna.tsinghua.edu.cn/anaconda/cloud
  bioconda: https://mirrors.tuna.tsinghua.edu.cn/anaconda/cloud
  menpo: https://mirrors.tuna.tsinghua.edu.cn/anaconda/cloud
  pytorch: https://mirrors.tuna.tsinghua.edu.cn/anaconda/cloud
  pytorch-lts: https://mirrors.tuna.tsinghua.edu.cn/anaconda/cloud
  simpleitk: https://mirrors.tuna.tsinghua.edu.cn/anaconda/cloud
  deepmodeling: https://mirrors.tuna.tsinghua.edu.cn/anaconda/cloud/
Some packages can not be found in the Tsinghua mirror source. Please search for them on the anaconda’s official website. And then download them manually.
Linux
Beautiful And Useful Shell
Install Oh My zsh
ipconfig
- .zshrc
# zshrc

# wonderful plugins

plugins=(git
  bundler
  dotenv
  sudo
  extract
  zsh-autosuggestions
  zsh-syntax-highlighting
  z
  )
# 颜色问题
ZSH_AUTOSUGGEST_HIGHLIGHT_STYLE='fg=yellow'

# load ckq_command\ bash_alias

echo "command in ~/.ckq_command"
if [ -f ~/.ckq_command ]; then
    . ~/.ckq_command
fi
## load ckq_command
[[ "$TERM_PROGRAM" == "vscode" ]] && . "$(code --locate-shell-integration-path zsh)"
## load vscode's integrated terminal
zsh-completions、
- zsh-autosuggestions
- 命令补全插件,输入命令按Tab键后会提示可以使用的命令和说明。
- 安装:
#Clone the repository inside your oh-my-zsh repo:
git clone https://github.com/zsh-users/zsh-completions.git ${ZSH_CUSTOM:-~/.oh-my-zsh/custom}/plugins/zsh-completions

#Add it to FPATH in your .zshrc by adding the following line before source "$ZSH/oh-my-zsh.sh":
fpath+=${ZSH_CUSTOM:-${ZSH:-~/.oh-my-zsh}/custom}/plugins/zsh-completions/src

#Start a new terminal session.
zsh
autojump
- 自动跳转目录插件,平时我们使用
cd时autojump都会记录下来,下次我们要进入这个目录直接使用j+目录名即可,如果遇到相同目录名它按你使用频率来决定跳转到哪个目录。 - Install
#Grab a copy of autojump:
git clone git://github.com/wting/autojump.git

#Run the installation script and follow on screen instructions.
cd autojump
./install.py or ./uninstall.py
- 历史命令提示zsh-autosuggestions
git clone https://github.com/zsh-users/zsh-autosuggestions ${ZSH_CUSTOM:-~/.oh-my-zsh/custom}/plugins/zsh-autosuggestions
git clone https://github.com/zsh-users/zsh-syntax-highlighting.git ${ZSH_CUSTOM:-~/.oh-my-zsh/custom}/plugins/zsh-syntax-highlighting
# 这个插件可以识别的shell命令并高亮显示,效果如下
ZSH 内置插件介绍
- alias-finder : 查找某个完整命令的 alias。
-
alias-finder “git pull”
- sudo
内置插件,按两下esc自动给上一条命令加上sudo
- extract 用于提取您传递的存档文件,它支持各种存档文件类型。
-
extract xxx.tar.gz - z 目录跳转,z命令模糊匹配目录,不需要完整路径(根据历史记录进行模糊匹配,因此当之前没有进入过目标目录时无法匹配成功)
在~/.zshrc文件中添加配置插件
-
colorize : 有了这个插件,你可以语法突出显示文件内容超过 300 种支持的语言和其他文本格式。
-
docker-compose : 给 docker-compose 添加自动补全,显示所有的 docker-compose 命令,提供一些 docker-compose 命令的别名。具体参考这里
-
docker : 给 docker 添加自动补全,显示所有的 docker 命令,提供一些 docker 命令的别名。
-
history : 提供了几个方便的别名,用于使用 命令来检查命令行历史记录。 用法 1:
h : history打印命令历史记录 ; 用法 2:hs : history | grep使用 grep 搜索命令历史记录 ; 用法 3:hsi : history | grep -i使用 grep 对命令历史记录进行不区分大小写搜索 。 -
jsontools : 用于处理 json 数据的方便的命令行工具。
-
pip : pip 别名和自动完成插件。
-
[proxychain is better] shell-proxy : 命令行代理工具,具体使用参考这里。
-
timer : 显示命令的执行时间
ckq_command \ bash_alias
alias setproxy="export ALL_PROXY=127.0.0.1:XXX"
alias unsetproxy="unset ALL_PROXY"

echo "ssh -R XXX:127.0.0.1:XXX XXX@XXX -p XXX"
echo "scp -r -P XXXX  /home/ckq/ckq_2023/llama  XXX@XXX:/home/ypl/Research2022_CKQ/LLaMa-6B"
export PATH="/home/ypl/miniconda3/bin:$PATH"
conda activate XXX
conda info --env
#export LD_LIBRARY_PATH=$LD_LIBRARY_PATH:/usr/local/cuda/lib64
#export PATH=$PATH:/usr/local/cuda/bin
#export CUDA_HOME=$CUDA_HOME:/usr/local/cuda
References
| [1] ([SEP8 \ PEP 8 – Style Guide for Python Code | peps.python.org — PEP 8 – Python 代码风格指南 | peps.python.org] |
[2] Barry’s GNU Mailman style guide http://barry.warsaw.us/software/STYLEGUIDE.txt
[3] Donald Knuth’s The TeXBook, pages 195 and 196.
[4] http://www.wikipedia.com/wiki/CamelCase
[5] Typeshed repo https://github.com/python/typeshed
Copyright
This document has been placed in the public domain.